
(Family Features) Holiday hams and deviled eggs may take center stage at Easter gatherings, but edible crafts offer a reminder of the magic of the season that’s found in moments spent together. Simple recipes that call for a dose of creativity are perfect ways to bring the kids to the kitchen, made even easier when all that work leads to sweet treats.
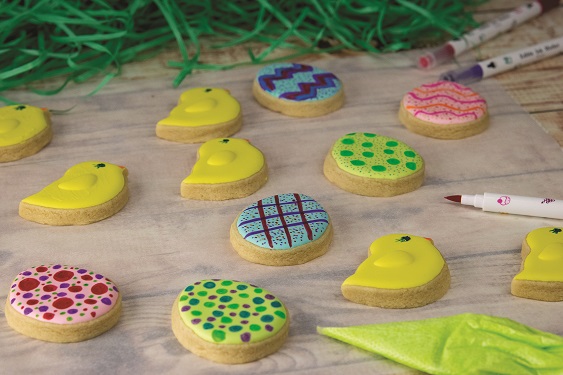
Children of virtually any age can relish in the joys of using cookie cutters and decorating Easter Sugar Cookies, all with a little supervision and short list of instructions. This version shows how to make the cookies and homemade icing so you can create any color you desire for maximum creativity.
Remember, these delicious crafts don’t have to be perfect – having fun and making memories that last a lifetime are what make Easter truly special.
Visit Culinary.net to find more Easter inspiration and recipes from “Cookin’ Savvy.”
Easter Sugar Cookies
Recipe courtesy of “Cookin’ Savvy”
Icing:
1/3 cup meringue powder
1/2 cup warm water, plus additional for thinning (optional), divided
3 tablespoons vanilla
1 bag (2 pounds) powdered sugar
2 tablespoons corn syrup
assorted food coloring
Cookies:
2 sticks unsalted butter, at room temperature
1 cup sugar
1 egg
1 tablespoon vanilla
2 teaspoons baking powder
1 dash salt
3 cups all-purpose flour
To make icing: Mix meringue powder, 1/2 cup warm water, vanilla, powdered sugar and corn syrup. Separate into bowls and add food coloring; mix with water, as needed, to thin for piping.
To make cookies: Heat oven to 350 F.
Cream butter and sugar. Mix in egg, vanilla, baking powder and salt. Mix in flour 1 cup at a time to form dough. Roll dough out to 1/4-1/2-inch thickness.
Cut into shapes, place on baking sheet and freeze 10 minutes. Bake 8-12 minutes. Cool completely before icing.
Place icing in zip-top or piping bags and cut off tips. Put cookies on parchment paper. Trace outline first then fill in middle. Use toothpicks to smooth out.
Let dry 6 hours and finish decorating with different icing colors or edible markers.
Source: Culinary.net